Tuesday 31 December 2013

Candles...again

Hi everyone! May I take this chance to wish you the happiest New Year!

I hope you are all ready for a wonderful crafting year ahead and I also hope that 2014 brings peace and happiness to all of you!

Here is another candle - I make so many at Christmas usually and so this year I decided to focus on other creations...but I couldn't leave candles alone entirely.....a few did sneak in! This is my last Christmas Candle to show you - but as I didn't manage to get the photos done until quite late it will have to be a New Year candle instead!


     Usually I decorate candles with serviettes - using just the top patterned layer and PVA glue diluted with water 3:1. This time I used white tissue paper - stamped with snowflake stamps using red ink.


    I used ivory hemp string stained with Festive Berries DS and when dry I wove it into a flower shape


.......and added a beige button to the center which was tied with ivory hemp string


 Twine was wrapped around the center of the candle


Very simple, but very festive decoration to have around at Christmas!

       Thank you so much for viewing my blog over the last year - I have the most amazing blog year and have been so inspired by all of you!

      Have a wonderful New Year! Hope to see you soon!


Follow on Bloglovin

Sunday 29 December 2013

Good enough to eat

Hello everyone!

     Hope you all had a really wonderful Christmas! Ready to get back to some crafting?
Hop over to Fashionable Stamping Challenges where we are bringing you a delicious colour challenge -

 
 and

Who could resist such wonderful yummy colours?!


    I spritzed a tag with water and then dabbed some Picked Raspberry DS and sprayed some Melted Chocolate Dylusions spray onto the tag, then dabbing with tissue.

I then used the mini antiquities stencil and sprayed Melted Chocolate through that and blotted the excess ink.


      I stamped one of my favourite quote stamps in Potting Soil ink


.....and used a Flonzcraft flourish corner stamp as well


    I blended some Walnut Stain DI around the edges and spritzed the tag very lightly with Melted Chocolate spray to give a speckled look.


    I curled some rusty wire and added some rusted roses.


Some die cut flowers were painted with Vanilla Fresco paint.


    I had some white paper flowers that I sprayed with water, then dabbed with Picked Raspberry DS and spritzed with some Melted Chocolate Dylusion spray. I stuck them onto the tag and then added pearl beads to the center of the flowers.


Why not come over and join us this time at Fashionable Stamping Challenges Remember we are a stamping challenge so please feature a stamped focal image on your creation  -  You could be the winner of $20 to spend at Flonzcraft Stamps! And of course you could be picked at one of our Catwalk Spotlights!


Follow on Bloglovin

Friday 27 December 2013

Christmas Garland

Hello everyone!

    Here is the promised Christmas Garland!

It seems I scheduled a post to go out on Christmas Eve...but I also forgot to finish the post - Apologies for my confusion! ;o)


 I used a length of twine to hang the tags up....
 

I made a wire ring for each and tying each tag to the length of twine. 


A loop was made at each end of the twine and hooked onto nails....and to hide the nails?....two lovely red bows!


      Hope you have all had a wonderful Christmas! See you soon!


 photo temp3_zpsf37f8b2d.png
  Follow on Bloglovin

Saturday 21 December 2013

Funkie Junkie 12 Tags of Christmas - Week Twelve

I have completed the final 12th tag....:o( It was so much fun and I didn't want it to end. Luckily Linda has extended the inspiration to include two thank you tags. I can't wait to get started on those, but I doubt I will be able to until after Christmas now!


       I loved the cream and gold colours on Linda's Tag and the stars were definitely inspiring. I couldn't find a suitable stamp so decided not to do image stamps on this tag. Instead I would focus on script stamp and frantage...keeping it simple.

     This tag was perhaps the trickiest of all of them (for me!) This result was the third attempt. I was experimenting with gesso and inks and not liking the results too much. Eventually I settled on using Nougat Fresco paint - which has a lovely subtle pinkish tinge. I covered the tag with it and then stamped the script stamp with Potting Soil archival ink.


    I covered the top of the tag with texture paste through a damask stencil. I covered the paste with gold embossing powder and heated with a heat gun. The effect was lovely and I shabbied it up a little with a dab of gesso wiped over the embossed surface with a baby wipe.


     I covered the edges with frantage powder to give a lovely frosty wintery look.


        The glitter in the frantage really catches the light at certain angles!


    I used one of my Idea-ology Bookplates painted with Snowflake Fresco paint and brushed with Treasure Gold.


   I decided to have a very pale pink/beige paper as the background for the bookplates with the word 'Tradition' from the chit-chat stickers.

  I brushed some Treasure Gold over the damask texture to highlight it

   As I didn't have the stars stencil I had to bring stars into the tag some other way. In my collection of metal pieces I found a brass coloured metal star which fitted perfectly.


      Why not come along and share in the fun of this challenge too?...all you have to do is make something inspired by each of the 12 tags and you could be in with a chance to win $50 to spend at the Funkie Junkie Boutique 


     I hope you have enjoyed seeing my 12 tags of Christmas this year. Thank you so much for being here to take a peek! I must also say a huge thank you to Linda for providing amazing inspiration and thanks so much for running a really amazing challenge - It has been wonderful to take part!....The 12 tags are already hanging up in my sitting room and look wonderful.....I will share some photos of the finished garland very soon!


I would like to enter this in the following challenge -

   Funkie Junkie - 12 tags of Christmas


Follow on Bloglovin

Thursday 19 December 2013

Christmas Catastrophe!


     Hi everyone!

    I was so thrilled when I found out that I was the Design Team Members'Special Mention at Country View Challenges for their 'Spooky' challenge. I was so happy to accept the opportunity to design for them again. When I found out that the challenge was to be anything about Christmas, I just knew that I had to share this special house creation with them.....


     I was inspired by one of my favourite artists - Nicola from Paper Profusion who made this gorgeous house you can see here. I thought it was so gorgeous - I loved how she used images behind the door. So I got my Christmas Nicecrane images and looked for a suitable picture...and that is when the ideas exploded!

      I found a picture of Father Christmas who, to me, looked a little bit worried. Then I found a picture of two little girls peeking from behind a curtain...They really should be peeking out the window....I think these little girls were staying up to catch a glimpse of Father Christmas.....and what if he arrived and saw they were waiting to see him....?

      I had a papermache house - the same I used for this and this. I love altering these houses. I was really looking foward to making this - I really adore making miniatures. I love all the problem solving and idea hunting that happens when working with this kind of project. I was glad that for once I wasn't having to make all of this in 1:12 scale - which is what I do with my dolls house. To me this was more of a novelty make and therefore I could be a bit carefree with the scale....and that made it even more fun.

     First I got some brick embossed card and covered it with Fired Brick and Vintage Photo DI. I covered the house with the card. The roof was covered with card that had been covered with Frayed Burlap DI and was cut into strips, which I glued on overlapped to look like a timber roof. I had covered it with a patchy layer of white embossing powder to give a snowy look....I knew I was going to be covering it with texture paste later, but this would be the beginnings of the snow effect.

      I cut a window out of card with a craft knife and painted it with French Roast Fresco paint. I cut the window 'glass' out of acetate and stuck it to the frame. Then I dabbed some Picket Fence DP behind the frame to give a subtle snowy window effect. Then I cut the image of the girls out and stuck it to the acetate.


      The door was cut from balsa wood and covered with French Roast Fresco paint and then some red card was cut to size and added to the frame to make the door. This was covered with Glossy Accents glue.


       I cut out some tiny holly leaves from the Nicecrane images (I adore fussy cutting and have some very good decoupage scissors for this) I have a circle punch so punched a small circle of card, folded it in half and cut an inner circle out leaving a small hoop. I covered this in Pine Needles DS and when dry I stuck the holly leaves on the ring to make a Christmas wreath. A small bow of ivory hemp string and a tiny sequin star finished the wreath.

     The icicles were acetate...cut into random zig-zag shapes and then dabbed with Picket Fence DP. After this glossy accents glue was applied followed by some Rock Candy Distress Glitter.


I added a lace diecut strip of card to the border at the top of the house and painted it with Stone Fresco Paint.


    The tree in the garden was made by cutting several identical Christmas tree shapes, covered them with Pine Needles DS. When dry I folded them all in half and glued all of them together forming a 3-D tree. A silver sequin star was covered in Glossy accents glue and then covered with Rock Candy Distress glitter.


Father Christmas was cut out from the images and glued onto card. Then Walnut Stain DI was blended around the edges.


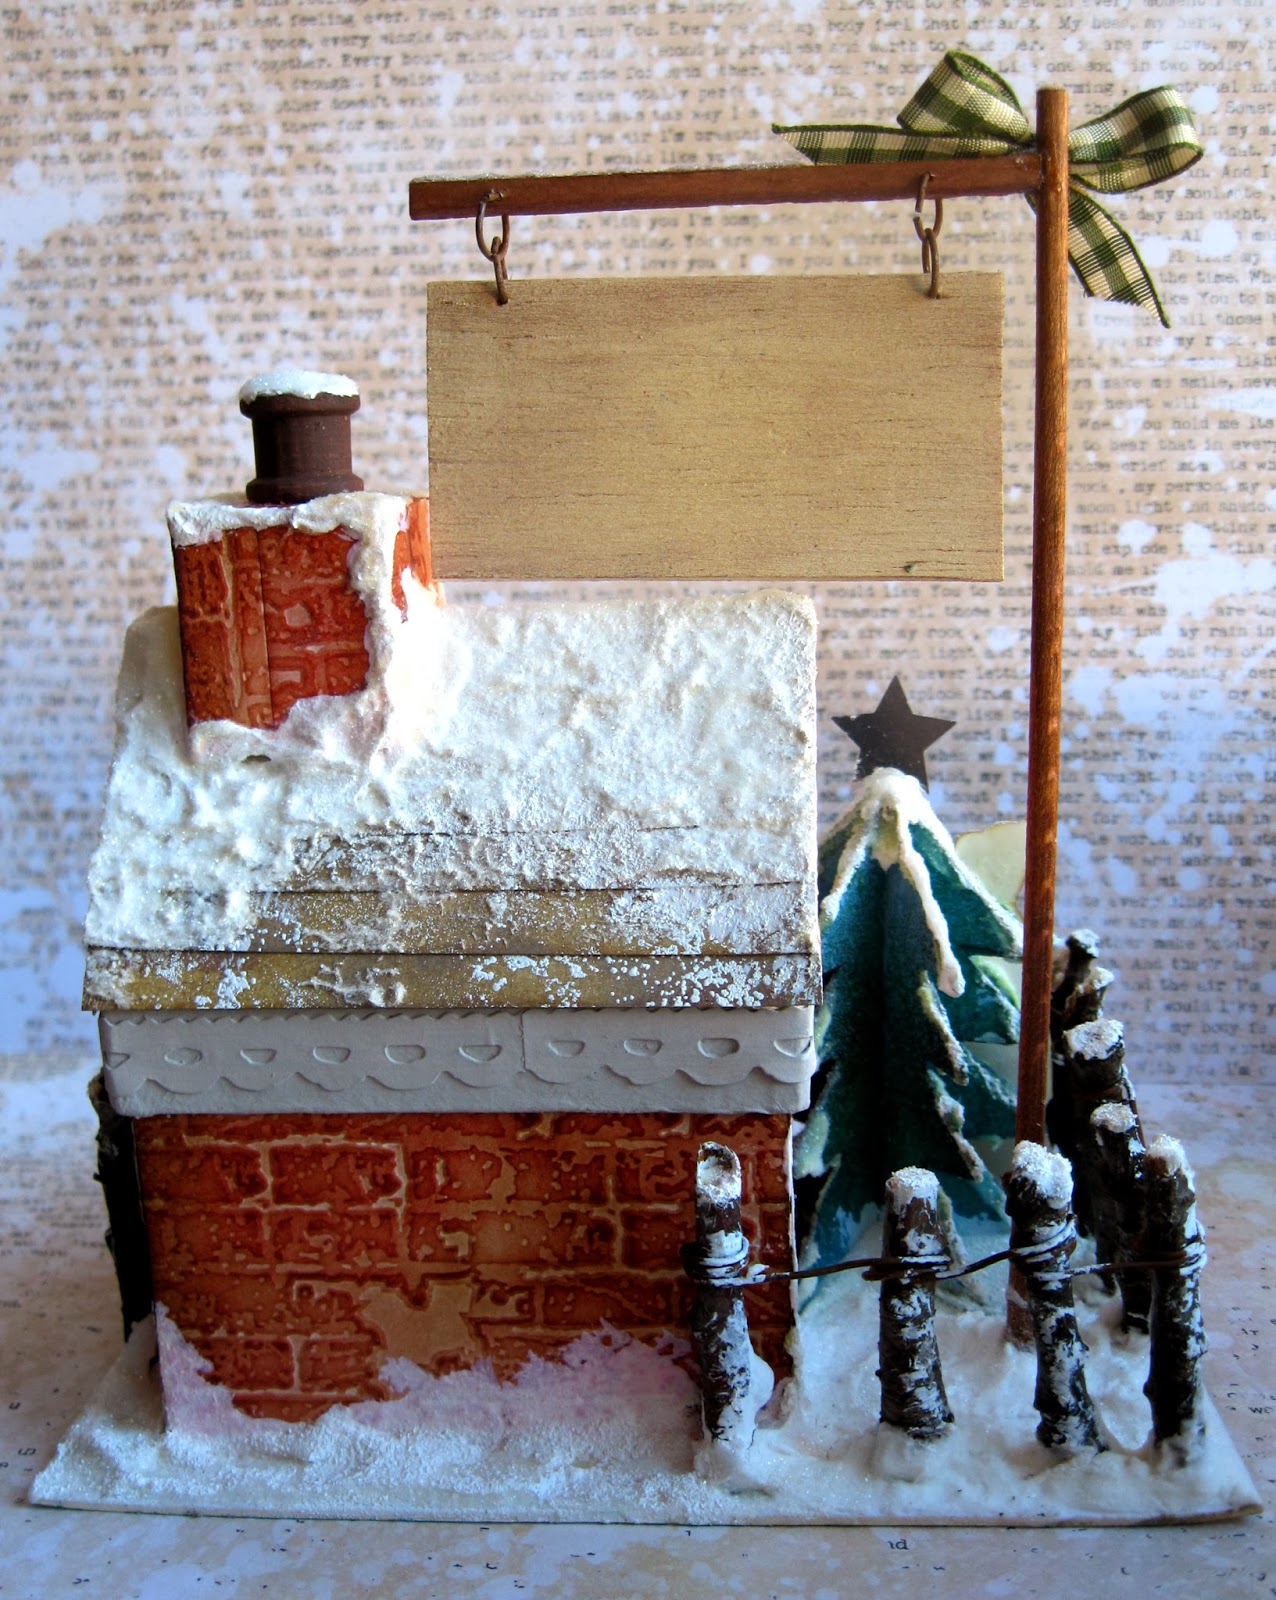
     The fence was made with branches from my garden. I broke them into small segments then wrapped rusty wire around them to link them.


       The 'Merry Christmas' sign was cut from balsa wood. I painted it with Vanilla Fresco paint, dry brushed some Chocolate Pudding Fresco paint over it and then stamped the Merry Christmas stamp with black Archival ink. I used a stardust embossing powder over the black ink to add a subtle sparkle. A flourish was stamped in Fern green Archival ink and dabbed with an embossing ink red pen..this was also embossed with the stardust embossing powder.


      The post was made from a wooden stick that I stained with Mahogany wood stain and I did the same with a piece of balsa wood that formed the top of the post. I made some holes in the post and the sign and made rings from rusty wire with some jewellery pliers. These rings were then used to attach the sign to the post.


A green gingham ribbon was stuck to the top of the post.


   Santa needed a sack and so I used a piece of burlap, stuck together at the edges and tied with twine. A candy cane brad I bought many years ago was stuck to the sack.


    I used a piece of mount board to construct the ground for the house. I used Frayed Burlap DP for the path and stuck the house to the board. I then scooped lots of texture paste onto the board and began to smoosh it everywhere for the snow.


    I stuck the fence posts into the wet texture paste and when dry they were surprisingly secure...I had expected them to fall over and need gluing in place, but there was no need. I covered the house and tree with the texture paste and then decided that if Father Christmas was visiting this house then surely there should be a chimney!


      I made the chimney from leftover brick embossed card. I cut the shape needed by using the end of the roof as a guide, drew around it (so I had the dimensions needed) and cut out the shapes. I then stuck it all together, adding a mini cotton reel, painted with French Roast Fresco paint, as the chimney pot. I stuck it to the roof and began to add more snow. 


    After the texture paste had dried I needed to whiten it up a little so dabbed some gesso all over and then got to work sprinkling Rock Candy distress glitter EVERYWHERE!....I think you might have guessed that I used a lot!!!


Thanks so much for being here and seeing my 'Christmas Catastrophe' house - I really hope Father Christmas doesn't get too cold waiting for those children to go to sleep! ;o)

    Why not head over to Country View Crafts and make something festive for the 'Bah Humbug' Challenge!

                Have a wonderful Christmas!!!!!!


 Follow on Bloglovin