Showing posts with label Artistic Outpost. Show all posts

Thursday, 10 December 2015

Believe for always

Hi everyone!  A seasonal creation today!

I recently bought a heat tool after mine had exploded in my hand ages ago...Yes, I was without a heat tool for over a year!....I don't know how I managed!

Anyway I had to finally give in and buy one because some embossing enamels were sitting there having never been used and I was desperate to try them out....and I never did have the patience to wait for things to dry....


 I made a background by swiping some Ground Espresso and Gathered Twigs DI on the craft mat, spritzed with water then swirled the card in the ink. I stamped some images from a Tim Holtz Christmas set in Ground Espresso DI and a script stamp in Jet black Archival ink to give layers and depth.


   I decided to use a stamp by Artistic Outpost - the vintage Santa is such a gorgeous image. I stamped it in Potting Soil Archival ink and blended some Vintage Photo DI over his coat and hat.


   I had just bought a Sizzix Thinlits Holiday greens die cut set and was so keen to try them! I had also had purchased a Sizzix flourish die cut by Pete Hughes called 'Graceful Flourish'

  ...I was soooo thrilled with it. It is a very delicate flourish and is so beautiful - the main thing I love about it is it's versatility. While it can be used whole as a gorgeous flourish, it can easily be cut into small sections to give various flourish accents. My favourite craft items are the ones with the most versatility - and so this is perfect.

     I cut out the flourish, the holly and snowflakes and wanted to cover them with Stampendous Frantage Embossing enamel. I began to dab them with clear embossing ink.... 

The holly was covered with Aged Hunter Green embossing enamel.


 The flourishes were covered with Aged Bronze embossing enamel 


 .....and the snowflakes were covered with Aged Ivory embossing enamel.


   I love that thick enamel effect!!!

I stamped the word 'Believe' in Archival ink and cut the word out before attaching it to the hanger with two bronze brads


I attached some lace to the bottom of the hanger along with some twine and I used twine to form the hanger at the top.


A final spritz of a snow effect with a bristle brush and some watered down Picket Fence DP.


And there is a Vintage Christmas hanger with enameled embellishments!
I hope you like it!

Happy Crafting!
Laura xxxxx


Follow on Bloglovin

Sunday, 17 May 2015

Old Favourites

Hi everyone!

     It is time for another challenge over at Fashionable Stamping Challenges today and the subject this time is....

Old favourites

Time to get out an old, forgotten but favourite stamp....


It was hard to choose one - It is always the same isn't it? We have so many stamps that often some get totally forgotten - So how do you choose one? 

In the end I decided to go for a stamp set that I adored from the moment I first saw it - Old Grist Mill by Artistic Outpost. I have always loved the photo quality images, the peaceful scenes, the gorgeous sentiments....it all makes up a winner of a stamp set for me.

Sadly, I haven't used it as much as I had hoped to. I have used the quotes a few times, but the images haven't had as much use as I had hoped and I figured that that made them perfect for this challenge...They are a firm favourite, but I have left them forgotten for too long.

The last time one of the stamp images was used was nearly a year ago...and in fact the image used here today has never been used before....

I decided to add to the challenge by opting for techniques that I had long forgotten too...the alcohol inks I bought in August 2013 (but had only been used once since then) had been sat on the shelf for too long.....It was time to change that too....


First I got some glossy paper and swirled it into a puddle of Lettuce and Ginger alcohol ink that had been diluted with blending soluction.


I stamped the image of the bridge using Jet Black Archival ink

I also coloured some more glossy paper with Lettuce and Ginger Alcohol ink, sometimes dabbing the ink with the felt covered blending tool and sometimes swirling the paper in ink. I then stamped images of the leaves and flowers on these pieces of paper using different coloured archival inks


I swiped some Frayed Burlap Distress paint across some card in straight lines to create a wood effect. I then cut it into strips and stuck it to mount board that had been painted with Raw Umber Acrylic Paint. I left gaps so it looked like wooden planks.


A hole punch was used to make four tiny circles of card. These were painted with Antiqued Bronze Distress paint and sprinkled with Vintage Photo Distress embossing powder. I then pressed an old plastic credit card into the embossing powder to make it look like a rusted screw head.


   I stamped one of the quotes onto card that had been covered with Old Paper Distress ink


 The other quote was stamped onto card that was covered with Lettuce Alcohol ink


The flowers and leaves were arranged at the sides of the picture with a button on each side.


And there it is - finally I have used the image of the old bridge and used some alcohol inks again!!!

I do hope you will come over to see what the rest of the team at Fashionable Stamping Challenges have made to inspire you this time...

Remember we are a stamping challenge so please feature a stamped focal image on your creation.
  
You could be the winner of $20 to spend at Flonzcraft Stamps! And of course you could be picked as one of our Catwalk Spotlights!
Hope to see you there!
Happy Crafting!

Laura xxx


I am sharing this over at 'Show us your AO art' this month


Follow on Bloglovin

Friday, 15 May 2015

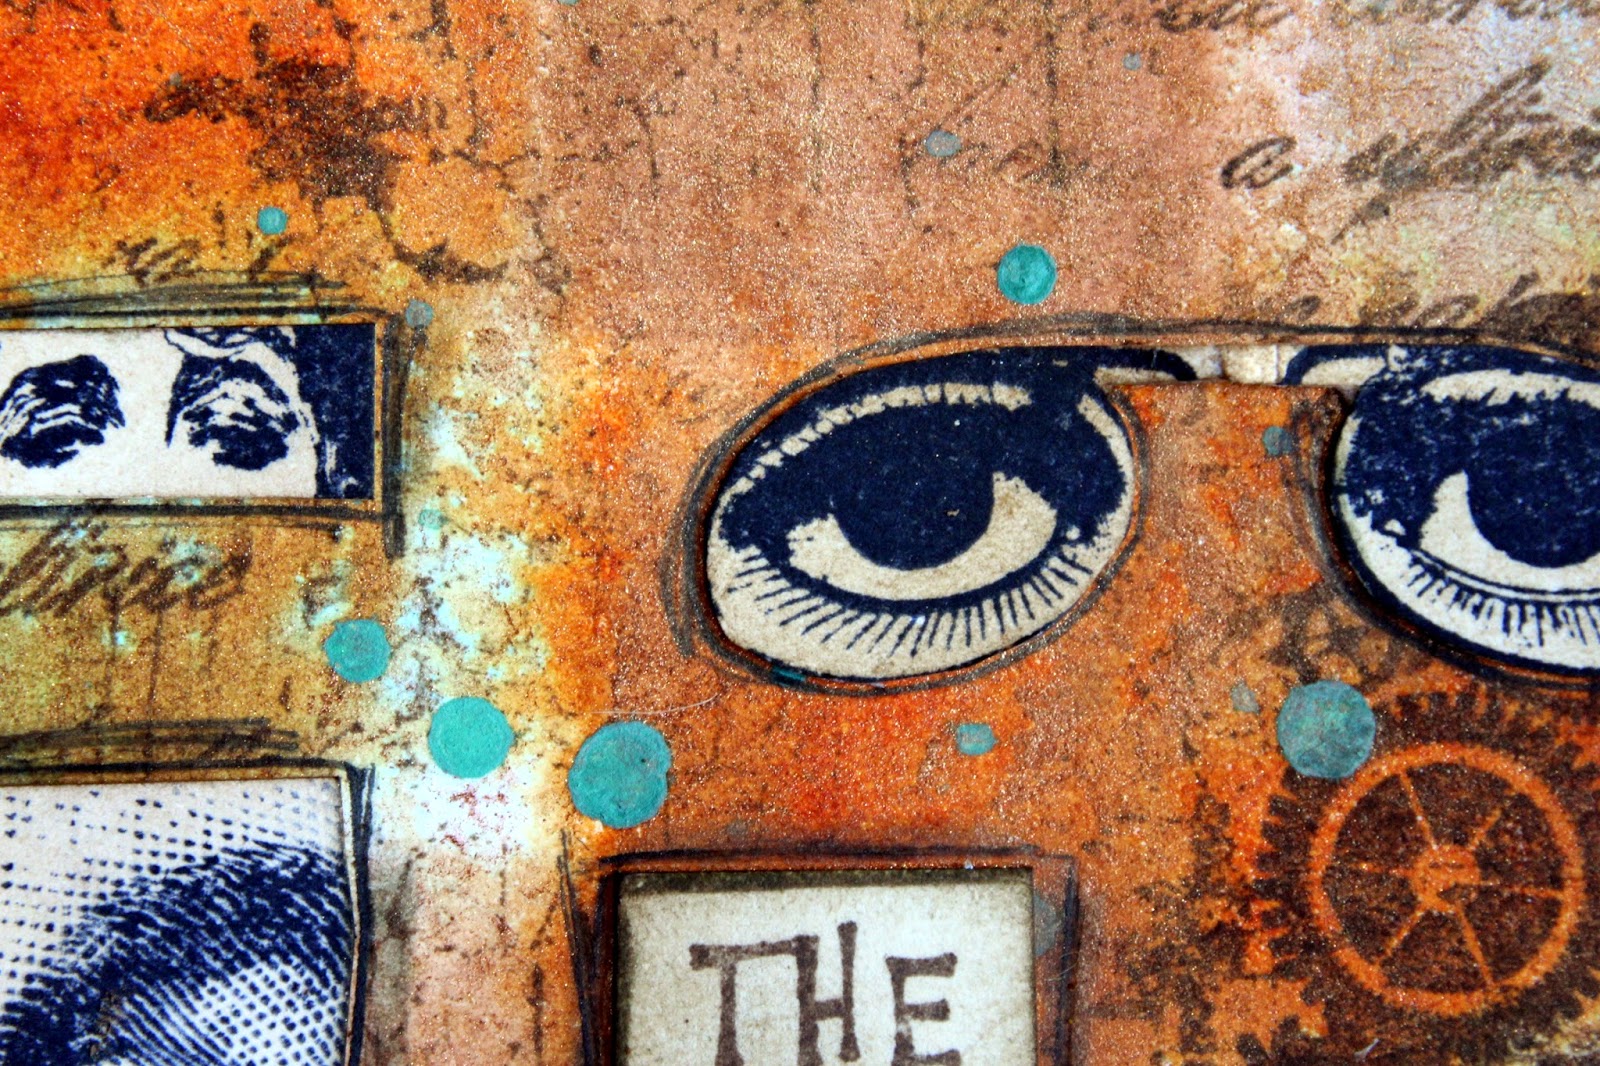
Eyes Tested

Hi everyone!

     I am here with another challenge over at Sandee and amelies Steampunk Challenges 

Eyes Tested


I decided to make a tag for this and to experiment with inks for a background.

 For this tag I chose Rusty Hinge, Tumbled Glass, Gathered Twigs and Walnut Stain distress inks. I used the blending tool like a stamp, inked it up and pressed it onto the tag. I 'stamped' lots of blocks of colour close together and sometimes overlapping. 

Then I spritzed it all with Copper Glimmer spray and let the colours run and merge


When dry I stamped the tag all over with a cracked paint stamp from the Andy Skinner industrial stamps 


 Then I splattered the tag with some Evergreen Bough Distress Paint


Then I stamped randomly with a french script stamp (that I found down the back of the stamp drawer while hunting for 'Eye' stamps)

A gears stamp from the Artistic Outpost set Industrial Backgrounds was used in the corner


 Then I began to stamp the eyes...various stamps were used inc -

Stampers Anonymous - Classics no 5
Flonzcraft - Gibson Girl 16 and Vintage Machines Engravings
Artistic Outpost - Generation Redux

 I stamped the eyes in Jet Black Archival ink and then cut then to size. I inked the card with Gathered Twigs DI and arranged them on the tag

I stamped the words "The Windows to the soul" on card and inked this with Gathered Twigs as well


I then stuck the words onto the tag and outlined them with Pumice Stone distress marker and added some rustic scribbled lines with a permanent fine tip marker

Dark brown hemp sting and a rusted rose was used to decorate the top of the tag


And so here it is - my 'Eyes Tested' tag.....


Hope I have inspired you to come along and dip your toes into some Steampunk....

Remember, if Steampunk isn't your usual style....we do love to see entries with just a hint of steampunk too!

Come over and see what the rest of the team have made to inspire you!

Happy Crafting!

Laura 
xxx


 Follow on Bloglovin

Wednesday, 15 April 2015

It's all an act


Hello everyone!

Over at Sandee and amelie's steampunk challenge the challenge this month is -

Raise the curtains

This month we challenge you to create Steampunk projects in which curtains play the main role.  
Your project can be anything that has to do with curtains (maybe being raised or pulled aside, revealing....well, whatever you can think of). I am sure you will once again surprise us all with your marvelous and imaginative projects!


When I saw this challenge my thoughts immediately were about making a theater...a Steampunk theatre of course!!!....

I constructed a theatre out of balsa wood and embossed card - here is how I made it...


I used a die cut as a template to cut out the balsa wood front. This was then covered with some embossed card.

I constructed the roof out of two pieces of balsa wood which were then covered with embossed card


The back was cut to size and all of it was attached to the base which was a much thicker piece of balsa wood to give it support. All of it was painted with Gesso, then covered with Burnt Umber Decoart Fluid Acrylic paint. It already had a bit of a tarnished bronze look already but I wanted to emphasize that, so I then rubbed it over with Iced Espresso Metallic Lustre. I thought this might be a huge mistake at first as the metallic effect was too bright....but another coat or Burnt Umber paint toned down the metallic effect really well and I ended up with the tarnished metal effect I had wanted....Happy accidents!


I stuck some buttons, a metal rose and an ornate corner onto the theatre


The background for the theater started off as a piece of card that had been swirled in Distress paints - I have absolutely no memory of what colours were used, but looking at it I would guess -Weathered Wood, Vintage Photo and Picket Fence Distress Paints. At the time this piece of card was made it had obviously not been 'right' for the project I had in mind and so had been put into the "Not useable at this time" box....I had found it and thought it was perfect for this creation.

I stamped it with Artistic Outpost stamps from French Flight and Industrial Backgrounds


Now onto the curtains...


I used some of my favourite material remnants that I had used for my dolls house - I knew it was perfect for this project. It is a printed velvet with a very subtle pattern. A two toned silky-soft velvet, it varies in shades from a gorgeous mink brown to a beautiful pale grey blue depending on which angle you look at it. Whatever way you view it there is always a hint of gold from the back of the material....absolutely stunning!


I had a very thin piece of brass tube that was cut to fit the width of the theatre and I sewed the curtain tops so that the tube could be inserted. Once they were sewn I attached the curtains and slotted the tube into the theatre


Pieces of rusty wire were twisted into loops with pliers to hold the curtains open


These were inserted into the walls of the theatre


The performance is about to start....


I used the image of the three men from the French Flight Artistic Outpost stamp set. I stamped them with Frayed Burlap DI and painted them with Tattered Rose DI mixed with water. I added detail to hair with marker pens. I stamped the bodies with Black Soot DI and painted parts with water to add a shading effect.

The actors were then stuck onto a piece of balsa wood painted with Decoart Carbon Black Acrylic paint so that they can be moved along the stage...


I do hope you like my Steampunk Theatre...Come on over to Sandee and amelie's Steampunk Challenge to see what the rest of the team have made to inspire you for this challenge....we would love it if you joined in!

Happy Crafting!
Love from Laura xxx


I am linking this creation to Artistic Outpost this month

Follow on Bloglovin